How to Seal Sandstone: Sealer Types, Steps and How Often
Penetrating vs topical sealers, natural-look vs enhancing, the water-drop test, step-by-step application and how often to reseal outdoor sandstone.
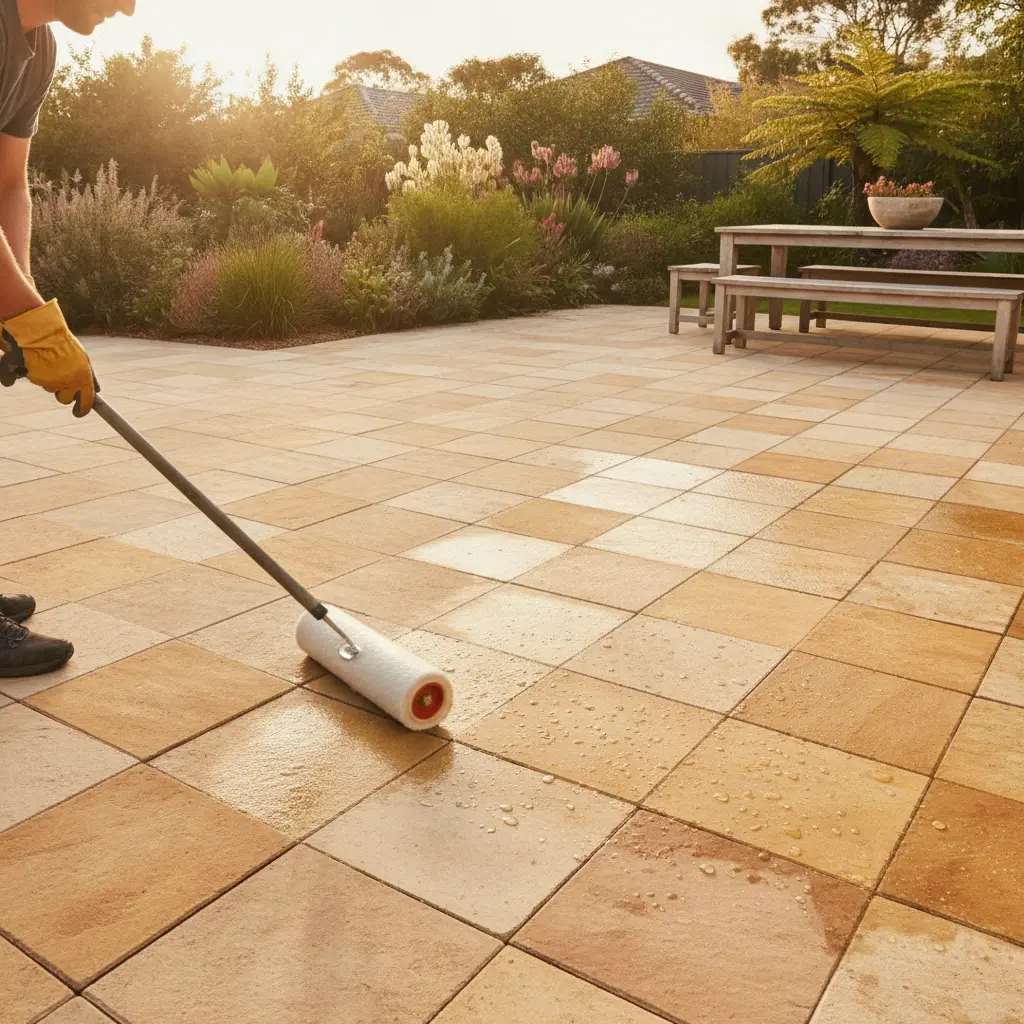
To seal sandstone, clean it, let it dry completely, then apply a penetrating (impregnating) sealer with a brush, roller or low-pressure sprayer, wipe off any excess before it dries on the surface, and keep traffic off while it cures. A penetrating sealer soaks into the pores instead of forming a film, so the stone keeps its grip and can still breathe. Reseal outdoor sandstone about every 2–3 years.
- Sealer type: penetrating (impregnating) for almost all outdoor sandstone; avoid topical film-forming coatings outside.
- Look: natural-look sealers are close to invisible; colour-enhancing sealers deepen the colour and give a permanently “damp” look.
- Test: if a few drops of water soak in and darken the stone within a few minutes, it needs sealing.
- How often: every 2–3 years outdoors, checked yearly with a water-drop test; pool surrounds and driveways can need it sooner.
- Never: acid cleaners on sandstone, before or after sealing.
Why does sandstone need sealing?
Sandstone is made of sand grains cemented together by natural minerals, and the spaces between those grains make it porous. Left unsealed, it soaks up water, cooking oil, red wine, leaf tannins, rust from furniture and, around pools, salt. Sealing slows that absorption so you have time to wipe up a spill before it becomes a stain. It also reduces the moisture that feeds mould and algae in shady areas and limits the white salt bloom (efflorescence) that can rise through paving.
Sealing does not make sandstone stain-proof or waterproof. It buys time and makes routine cleaning easier. Most paving, tiles, pool coping, capping, bench tops and outdoor kitchen surfaces benefit from sealing. Garden walls, boulders and rockeries in a bushland setting are often left unsealed so they weather and grow lichen naturally.
Penetrating vs topical sandstone sealers: what’s the difference?
There are two broad families of stone sealer. A penetrating (impregnating) sealer soaks into the stone and lines the pores with a water- and often oil-repellent treatment, leaving no coating on top. A topical (film-forming) sealer, such as an acrylic or polyurethane coating, sits on the surface like a varnish.
| Sealer type | How it works | Appearance | Slip resistance | Where it suits |
|---|---|---|---|---|
| Penetrating, natural look | Soaks into the pores; no surface film | Little or no change | Surface texture unchanged | Outdoor paving, pool coping, walls, indoor tiles |
| Penetrating, colour-enhancing | As above, plus an enhancer that deepens colour | Richer, darker, “wet” look | Usually little change; test a patch | Feature paving, cladding, capping, indoor tiles |
| Topical (film-forming) | Forms a coating on top of the stone | Satin to gloss sheen | Can be slippery when wet | Rarely suits outdoor sandstone |
Topical sealers cause most of the problems people blame on sandstone. Because sandstone is porous, moisture rises through it from the bedding below. A surface film traps that moisture, which turns the coating cloudy or white and makes it peel. Films also scuff in foot traffic and have to be stripped before the stone can be resealed. For outdoor sandstone, stick with a penetrating sealer.
Does sealing make sandstone slippery?
A penetrating sealer leaves no film, so the surface texture, and the grip that comes with it, stays largely the same. Topical coatings are the ones that turn slippery when wet. The finish of the stone matters far more than the sealer: sawn, sandblasted and natural split faces give more grip than a smooth honed face. See our page on sandstone finishes for how each one looks and feels.
What is the best sandstone sealer?
There is no single product that suits every job, and we don’t recommend brands. What matters is choosing the right category of sealer for where the stone is going. When you compare products at a hardware or tile shop, look for these points on the label:
- Labelled for sandstone or porous natural stone, not just for concrete or dense stone such as granite.
- Penetrating or impregnating, and described as breathable (vapour-permeable).
- Water and oil repellent if the area is used for eating, barbecues or outdoor kitchens. A sealer that repels water alone won’t stop grease stains.
- Suitable for salt-water pools if it is going on coping or a pool surround.
- Natural look or colour-enhancing, depending on the finish you want. Always test an enhancer on an offcut first, because the change is permanent.
- Coverage rate: porous sandstone usually drinks more sealer than dense stone, so expect to land at the lower end of the label’s coverage range and buy enough from one batch.
Water-based penetrating sealers have less odour and clean up with water. Some installers prefer solvent-based products on very porous stone. Either can work if the product is made for sandstone and applied as the label directs.
How to seal sandstone step by step
1. Let new paving cure and dry
New paving laid on a mortar bed holds a lot of moisture. Sealers need dry stone to soak in properly, so most sealer makers ask you to wait several weeks after laying. Follow the label. Some installers pre-seal tiles and pavers before grouting so mortar and grout can’t stain the face; check that your sealer allows this.
2. Clean thoroughly
Sealer locks in whatever is on the stone, so remove dirt, mould, efflorescence, rust marks and grout haze first. Our guide to cleaning sandstone and removing stains covers the right cleaners for each type of mark.
3. Let it dry again
Allow at least 24–48 hours of dry weather after cleaning, and longer in shade or winter. Check the forecast too: you need a dry spell during application and for the period the label specifies afterwards.
4. Test a patch
Seal an offcut or a hidden corner and let it dry. This confirms the look, especially with an enhancer, and shows how quickly the stone absorbs.
5. Apply the sealer
Mask render, timber, glass and plants. Work in manageable sections with a brush, roller or low-pressure sprayer, applying an even, generous coat so the stone can absorb as much as it needs. Many penetrating sealers call for a second coat applied “wet on wet” before the first dries. Avoid hot midday sun, which makes the sealer flash off before it soaks in; early morning or late afternoon is easier.
6. Remove the excess
Within the time given on the label, wipe or back-roll any sealer still sitting on the surface. Leftover sealer dries into sticky, shiny or patchy marks that are hard to remove.
7. Let it cure
As general guidance, many penetrating sealers are touch dry within a few hours, take light foot traffic after about a day and need several days to reach full repellency. Keep furniture, pot plants and hoses off until then. Cure times vary between products, so always follow the label.
How often should you seal sandstone?
| Area | Typical resealing interval | Why |
|---|---|---|
| Outdoor paving and patios | Every 2–3 years | Sun, rain and foot traffic wear the sealer down |
| Pool coping and surrounds | Every 2–3 years, test yearly | Salt, pool chemicals and frequent hosing |
| Driveways | Test yearly | Tyre wear and oil drips |
| Walls, cladding and capping | Test every couple of years | Less wear, but full weather exposure |
| Indoor tiles | Test yearly; reseal when water soaks in | Kitchens and bathrooms wear faster than living areas |
How to test if sandstone is sealed (the water-drop test)
- Pick three or four spots, including a high-traffic area and a shady one. The stone must be dry.
- Drip a small puddle of water (a teaspoon or so) onto each spot.
- Wait a few minutes and watch. If the water beads and sits on top, the sealer is working. If the stone darkens slowly around the edges, the sealer is wearing and a reseal is due soon. If the water soaks straight in and the stone goes dark, it is unsealed or the sealer has worn out.
- For kitchens and barbecue areas, repeat with a few drops of cooking oil on an inconspicuous spot and wipe it off after ten minutes. A dark ring means there is no oil protection.
Do this test once a year rather than resealing by the calendar. It tells you exactly which areas need attention. Resealing is quicker than the first seal: clean, dry, test, then apply one coat to the worn areas and blend it out across the rest.
Sealing sandstone around pools and salt-water areas
Salt is hard on any porous stone. As pool water evaporates from the surface, salt crystals form inside the pores. The crystals expand and, over time, can make the face of the stone flake or powder. This is often called salt attack. Sealing coping and the pool surround with a penetrating sealer rated for salt-water pools slows the water and salt getting in.
Some installers seal the underside and edges of coping before laying it, so less moisture is drawn up from the bedding. Hose the surround with fresh water now and then to rinse off salt, and never let concentrated pool chemicals sit on the stone. Our sandstone pool coping guide covers finishes, falls and coping profiles for pool areas.
What not to use on sandstone
- Acid cleaners, including hydrochloric (muriatic) acid, most brick cleaners and vinegar. Acid attacks the natural cement holding the sand grains together and can leave the stone etched or stained yellow and orange.
- Strong bleach left to sit, which can discolour some colours.
- A pressure washer held too close, which erodes the face. Use a wide fan tip and keep your distance.
- Gloss or film-forming coatings outdoors, for the reasons above.
- Sealing over dirt, salt bloom or damp stone, which traps the problem underneath.
- Mixing sealer types without checking. A penetrating sealer can’t soak in through an old topical coating, which has to be stripped first.
Get sandstone ready to seal from Stone Front
Our outdoor sandstone tiles (from $110/m², guide price) and sawn all round pavers (from $120/m², guide price) are quarried, sawn and finished at Glenorie in the Sydney Hills, and seal well with a quality penetrating sealer. Browse the full range of sandstone tiles in Sydney, then request a quote. Final pricing depends on quantity, finish and delivery.
Frequently Asked Questions
Can I seal sandstone myself?
Yes. A penetrating sealer goes on with a brush, roller or low-pressure sprayer, so most homeowners can do a patio or path themselves. The keys are cleaning first, waiting until the stone is completely dry, testing a patch and wiping off excess before it dries. For large pool surrounds or stained stone, get two quotes from a professional.
How much does it cost to have sandstone sealed?
Professionals usually quote by the square metre, and the price depends on the area, how much cleaning is needed first, the sealer chosen and access. Porous sandstone uses more sealer than dense stone, which affects material cost. Get two quotes and ask whether cleaning, a test patch and removal of excess are included.
What happens if it rains after sealing sandstone?
Rain on uncured sealer can dilute it, wash it out of the surface or leave patchy marks, especially in the first day. Check the forecast and keep the stone dry for the period the product label specifies. If rain hits early, let the stone dry fully, check it with a water-drop test and re-coat the affected areas.
Do indoor sandstone tiles need sealing?
Yes. Indoor sandstone is just as porous as outdoor stone, so kitchens, bathrooms and living areas should be sealed with a penetrating sealer that repels both water and oil. Some installers pre-seal tiles before grouting so grout can’t stain the face. Test indoor floors yearly with a few drops of water and reseal when they soak in.
Will sealing stop mould and black marks on sandstone?
It helps but does not stop them entirely. A penetrating sealer reduces the moisture that mould and algae need, so shady paving stays cleaner for longer. Damp, shaded areas under trees will still need periodic cleaning with a stone-safe cleaner. Never use acid cleaners, which damage sandstone.